.png)
Histology 101: Fresh Tissue Fixation, Processing & Embedding
- Eghosa Arovo

- Mar 12, 2025
- 4 min read
We kick-start our 'Histology 101' series with 'From fixation to embedding'. Every step in tissue preparation is critical to high-quality histology; learn why precision in these processes matters in our latest blog! #Histology #TissueProcessing #LabNexus #CancerResearch #CancerResearchUK
Histology is a fundamental discipline in biomedical science, allowing researchers and clinicians to analyze tissues at a microscopic level. However, before tissue samples can be examined under a microscope, they must undergo a meticulous preparation process.
Fixation, processing, and embedding are three crucial steps that preserve tissue structure, prevent degradation, and ensure high-quality microscopic analysis.
At LabNexus, we follow gold-standard histological practices and utilize the Sakura VIP Tissue Processor, one of the most advanced tissue processors available today. Let’s dive into each stage and understand its significance in histology.
Step 1: Tissue Fixation – Preserving Cellular Integrity
Fixation is the first and most critical step in tissue preparation. Its purpose is to preserve tissue morphology, prevent autolysis (self-digestion by cellular enzymes), and protect against microbial degradation. Without proper fixation, tissue samples may deteriorate, making accurate histological examination impossible.
How Fixation Works
Fixatives cross-link proteins and stabilize tissue structures, maintaining the relationship between different cellular components. This step also enhances staining efficiency, ensuring consistent histological results.
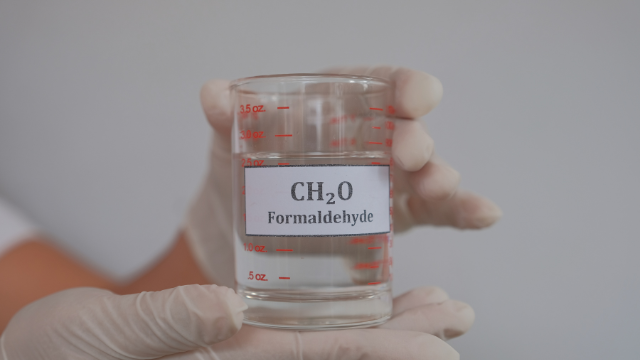
The most commonly used fixative is 10% neutral-buffered formalin (NBF), which is preferred due to its ability to penetrate tissues effectively while maintaining structural integrity [1]. However, at LabNexus we use Methylated Spirit (IDA 99), 99% for the purpose of research.
Key Fixation Considerations
Time: Optimal fixation time varies depending on tissue size and type (typically 6–24 hours for formalin fixation).
Fixative Volume: Use a fixative-to-tissue ratio of at least 10:1 to ensure complete penetration.
Temperature: Room temperature fixation is standard, but cold fixation may be required for certain specimens.
Histology experts emphasize that poor fixation can lead to tissue shrinkage, loss of antigenicity in immunohistochemistry (IHC), and inconsistent staining [2].
Step 2: Tissue Processing – Preparing Tissues for Embedding
Once fixation is complete, tissues must undergo processing, a multi-step procedure that removes water and prepares tissues for embedding in paraffin wax. This process involves dehydration, clearing, and infiltration.

Stages of Tissue Processing
Dehydration: Removing water using a graded series of ethanol (IMS) (70% to 100%).
Clearing: Replacing ethanol with an organic solvent xylene, which makes tissues transparent and compatible with paraffin.
Infiltration: Saturating tissues with molten paraffin wax to support structural stability during sectioning.
At LabNexus, we use the Sakura VIP Tissue Processor, known for its automated, precise processing capabilities, ensuring optimal tissue preservation and high reproducibility [3].
Why Proper Processing Matters
Inadequate dehydration can lead to poor paraffin infiltration, causing difficulties in sectioning.
Improper clearing may result in uneven tissue transparency, affecting final staining quality.
Efficient infiltration ensures tissues are uniformly supported for embedding and microtomy.
Step 3: Tissue Embedding – Ensuring Proper Orientation
Embedding is the final step before sectioning and involves enclosing processed tissues in a solid paraffin wax block. The goal is to support the tissue and allow for precise thin-section cutting.

How Embedding Works
Tissues are carefully positioned in a metal or plastic mold filled with molten paraffin wax. Once the wax hardens, the tissue is locked into place for sectioning with a microtome.
Proper orientation during embedding is crucial, especially for diagnostic tissues where specific structures must be sectioned in a particular plane. A study published in the Journal of Clinical Pathology highlights that misorientation during embedding can result in incorrect diagnoses or the need for repeat sectioning, leading to delays and potential loss of critical information [4].
Best Practices for Tissue Embedding
Correct orientation ensures pathologists view the tissue in the proper plane.
Even paraffin infiltration prevents sectioning artifacts.
Avoiding air bubbles maintains tissue integrity.
To conclude?
Proper fixation, processing, and embedding are essential to ensuring high-quality histological slides. Each step must be performed with precision to prevent artifacts, degradation, or misinterpretation.
Our next Histology 101 blogs will explore further steps in the histo lab, including sectioning the embedded blocks with microtomes, staining, IHC and more!
At LabNexus, we specialize in expert tissue processing, using state-of-the-art technology like the Sakura VIP Tissue Processor to guarantee high-quality histological preparation. Whether you are conducting cancer research, drug discovery, or routine histopathology, our services provide the accuracy and reliability you need.
References:
Carson, F. L. (2009). Histologic Fixation and Processing. College of American Pathologists. (https://documents-cloud.cap.org/estore/pdf/PUB123_Histologic_Sample.pdf)
Dako. (2008). Chapter 16: Fixation and Tissue Processing. (https://lidoc.paginas.ufsc.br/files/2013/10/about-fixations_DAKO.pdf)
Sakura Finetek. (n.d.). VIP 6 AI Tissue Processor. Retrieved from https://www.sakuraus.com/product/vip-6-ai/
Ushida, K., Asai, N., Uchiyama, K., Enomoto, A., & Takahashi, M. (2023). One-step embedding method for maintaining orientation of pathological tissue specimens using agar thin films. Journal of Clinical Pathology. (https://pubmed.ncbi.nlm.nih.gov/37845018/)


Comments